Social Media Savvy: Getting Started with Video to Effectively Communicate
/
Web video is exploding in popularity, with over 800 million unique visitors watching over 4-billion hours of video each month on YouTube alone! And with more agencies and organizations participating in social media spaces like Facebook and Twitter, it's important to realize that videos get more clicks and "shares" from users than plain old text-based content alone. So how do you get started creating your own content? It's easier than you might think! Here are some tips:
What To Share
Your agency does many everyday activities that can make great video content.
Holding a conference or on-site forum? Do a brief recap video summarizing the
key points. Holding a community event? Release a promotional video in advance, then
post a quick "update" during the event itself for immediate sharing.
Got a hot topic making news in your are of influence? Sit down with your
subject matter expert and do a short interview concisely covering what people
need to know. Getting unfairly bashed by the media? Shoot your own video
telling the whole story.

Cameras
You don't need to spend a lot to get a good video camera. The Kodak Zi10
(currently available for about $99 on Amazon.com) is the only small pocket
camera of its kind with a removable SDHC memory card and a connector to plug in
a microphone. Another option is the iPhone or iPad. The newest models have
excellent built-in cameras that record in HD, and tripod mounts are available
so you can shoot rock-steady shots. Canon Vixia video cameras are known for
great quality and start at about $300. If you plan to shoot a lot and have the
funds available, you may wish to invest in a more expensive camera with better
image sensors and professional audio connectors. (Visit my web site at www.KerryShearer.com for
recommendations on all these options).
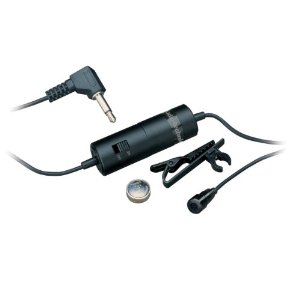
Audio Technica ATR-3350 wired lavaliere microphone - less than $20
Audio
Lesser-quality video is forgivable, but poor quality audio is not. That's why you never want to use a camera's built-in microphone to record interviews; it will sound hollow or echoey when the person speaking from several feet away. When buying, choose a camera that allows you to plug in an external microphone. Inexpensive cameras use a 3.5mm connector (the size of a mini headphone jack). Higher-cost cameras ($1,800+) use heavy-duty 3-pin XLR audio connectors, the professional standard. Clip-on lavaliere, hand-held, or wireless mics are available no matter what kind of connector you have.
Shooting Video
If you have a high definition camera, always shoot in HD, which creates a widescreen (16:9 aspect ratio) image at the highest quality. Even if you are going to output the final product in standard definition widescreen format for the web, it will look a lot better if the original footage is HD. Make sure you have adequate lighting, and never shoot interviewees in front of an office window, as the backlighting will fool an inexpensive camera's auto-exposure mechanism and darken the image. Use a tripod whenever possible. Most cheap tripods don't allow for smooth panning or tilting, so get a fluid-head tripod if the budget allows. Be sure to capture a variety of wide, medium and tight shots to allow yourself plenty of editing options. If you go hand-held, hold the camera securely with both hands and lock your elbows to the sides of your torso, When you pan left or right, move your entire upper body. This will allow much steadier shots. During interviews where an off-camera producer is asking questions of your subject matter expert, place the producer just to the side of the camera so the interviewee is not looking directly into the lens.
Transferring Your Video
Once you have recorded all the elements of your video, it is time to transfer the files to the computer. Because virtually all of today's cameras capture video directly to memory cards instead of old-school DV tape, the process is fast and easy: you can simply place the memory card into a card reader connected to your computer and drag the video files right onto your computer’s hard drive and start editing immediately. Many cameras also allow you to connect to your computer via a USB cable to transfer files.
Video Editing Programs
Whether you are PC or Mac-based, there are many editing program choices. For PC, the most basic (and perhaps least versatile) is Windows Movie Maker, which can be downloaded free from the Microsoft site. Next up is Adobe Premiere Elements, a less-capable version of the full-featured Adobe Premiere Pro. For Apple users, Adobe makes a Mac version of Premiere Pro. Or, you can use Apple’s iMovie, the less-expensive version of its pricier Final Cut Pro X. If you plan to invest some resources, consider Adobe's CS6 Production Premium suite. It's expensive, but offers a whole suite of integrated programs to aid you in your productions, and the overall cost is far less than buying the programs individually. These suites typically contain programs that allow you to manipulate and prepare still images, create compelling animated opens and closes for your videos, and burn DVDs with menus. If you're shooting on iPhone or iPad, download Apple's $4.99 iMovie app. You can edit and upload right from your i-device!
How To Edit
You’ll need to dedicate some time to learning the video editing program you select. But they all use the same concept: You drag your imported video clips down what is called the editing “timeline” and line them up in the order you want to use them. Selection tools let you trim the starting point and ending point for each clip. You can then apply video effects, such as a smooth “dissolve” between clips, or perhaps a “wipe” or “zoom” transition. Editing programs offer many options – the key is to keep it simple and not overuse effects, which can dilute the impact of your production if not used effectively. The timeline offers multiple “layers” of audio and video, so you can stack effects. For example, you might have a medium shot of the on-camera host on video layer one, then put an over-the-shoulder graphic on video layer two. The host's audio would be on audio layer one, and background music on audio layer two.
Outputting Your Completed Video
Once your production is done, it’s time to output it. The great thing is that video editing programs have export "presets" for specific services, such as YouTube or Vimeo. For example, when I export videos, I generally use the "YouTube HD" preset, which creates a high-def file in a web-friendly H.264 compression standard format. I also recommend saving a copy of your project in its full, original quality (usually .AVI or .MOV). You can also burn the project to DVD.
Producing your own web videos can be very beneficial for your agency and really ramps up your social media engagement. It allows you to create content quickly and update it as often as needed. Start simple, and expand as you develop more skills.
I'll be posting training on my web site to help communicators develop their video, audio and social media skills. Please visit www.KerryShearer.com to be notified about free training materials as they become available.
Have fun, and I'll look for you on YouTube!

Kerry Shearer is a broadcaster, communicator, social media/communications consultant, and Chair of the National Public Health Information Coalition's Web and Social Media Committee. He's a frequent emergency communications trainer and speaker at national conferences on social media and web audio/video techniques.